You do not need to set up any AI to use Claude Code
The “Connect the AI” page in the welcome guide sets up the Ultenix AI bar (the feature that turns a plain-language request into a command). Claude Code is started by typing claude in the Ultenix terminal and has nothing to do with that setting. On the “Connect the AI” page, choose nothing and press “Next”.
1. Download and install
- On the download page, press “Download for macOS”.
- Open the .dmg file you downloaded.
- In the window that appears, drag the Ultenix icon onto the Applications folder beside it.
- Open Ultenix from your Applications folder.
Ultenix is notarized by Apple, so no security warning appears. The first time only, macOS asks ““Ultenix” is an app downloaded from the Internet. Are you sure you want to open it?”. Press “Open”.
macOS 11 or later. Apple silicon and Intel. Signed and notarized.
2. The welcome guide on first launch
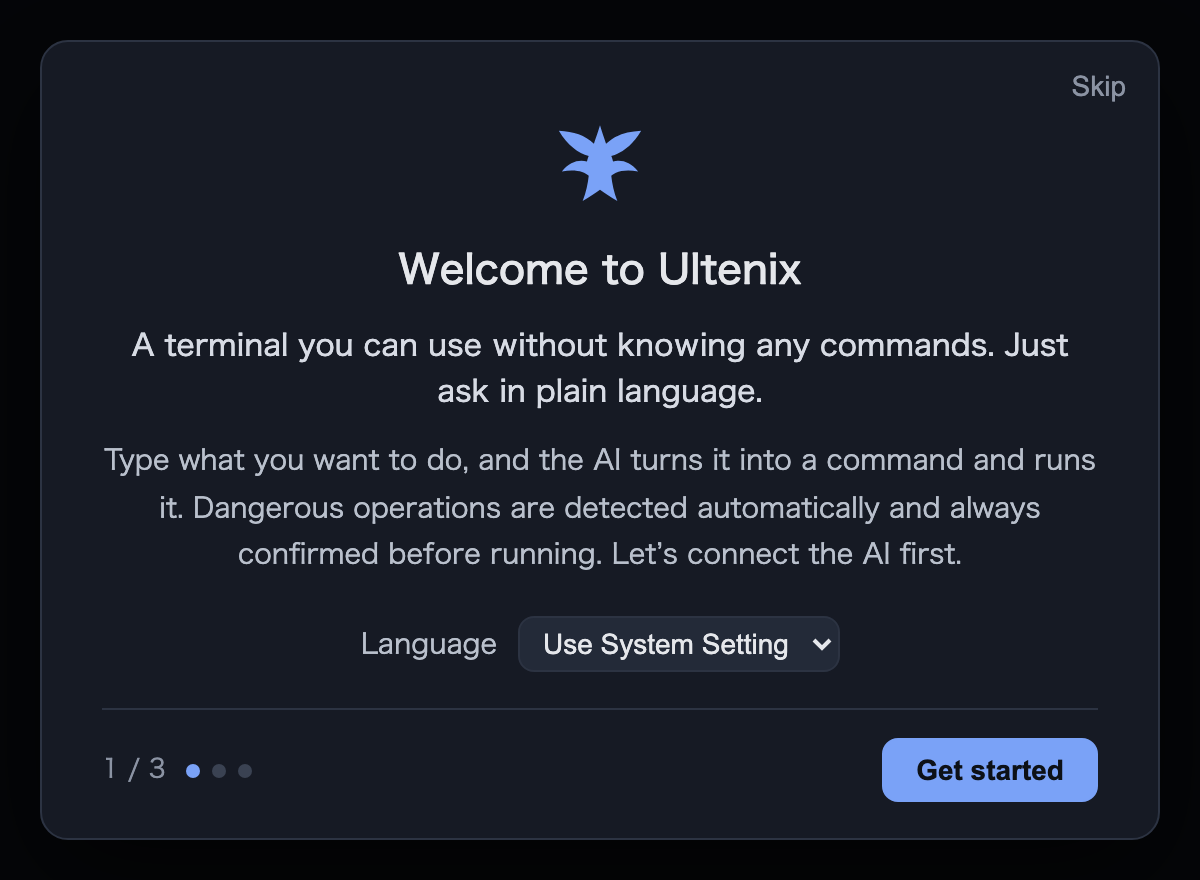
The first time you open Ultenix, a three-page welcome guide appears.
Page 1: “Welcome to Ultenix”
Choose your language and press “Get started”.
Page 2: “Connect the AI”
This page shows “Pro (zero-setup AI)”, “Local AI (Ollama)” and “Advanced: use a Claude API key”. These are settings for the AI bar. If you only want Claude Code, choose none of them and press “Next”. You can change this any time later in the “AI” tab of Settings.
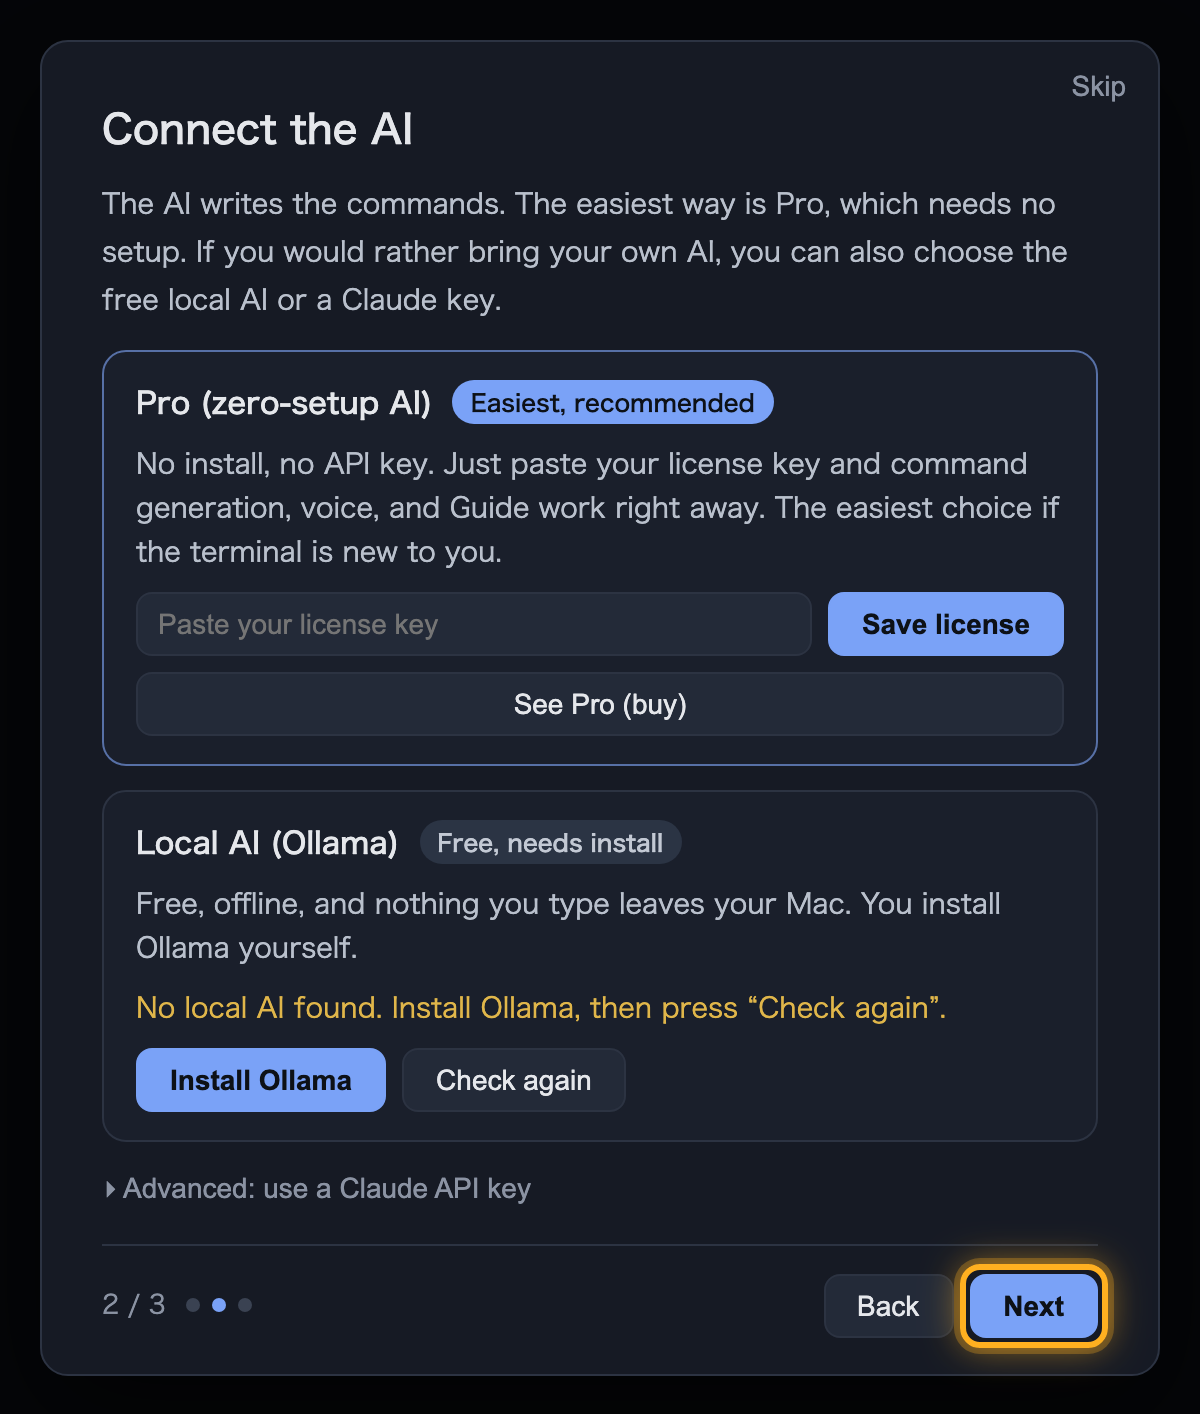
A “Claude API key” is a separate contract from a paid Claude plan (such as Pro). You do not need an API key to use Claude Code.
Page 3: “Give it a try”
Press “Get started with Claude Code” to start the Claude Code setup guide (explained in the next section). Press “Done” to close the welcome guide.
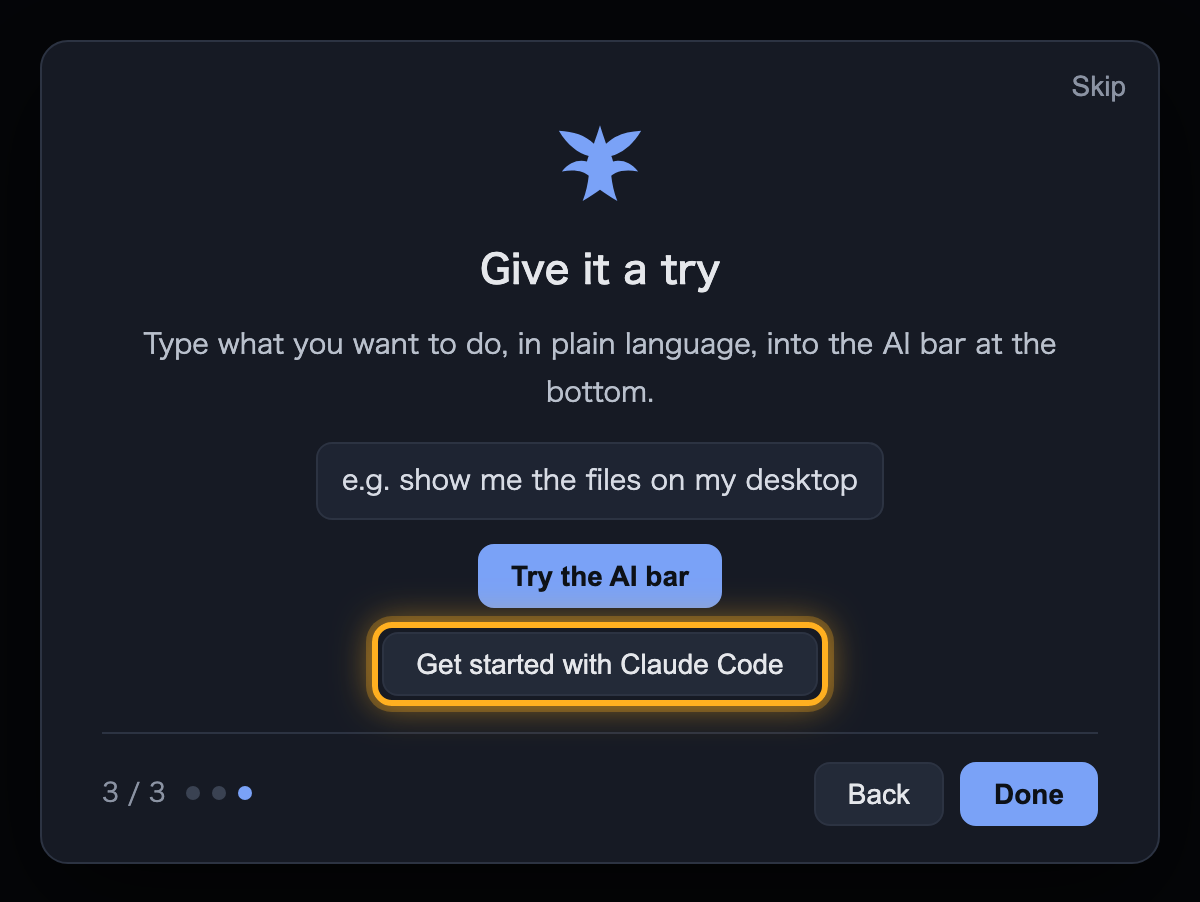
“Skip” at the top right closes the whole welcome guide at once. Even after that, you can start setting up Claude Code as described in the next section.
3. Register your license key
The terminal itself is free and works without a license key. If you bought Pro, or received a license key by email as a benefit, register it as follows. Registering unlocks the hosted AI, dictation, the Guide, session resume, and access from iPhone and iPad.
- Open the email with your license key and copy the whole key, from the first character to the last.
- Choose “Settings…” from the “Shell” menu in Ultenix (or press ⌘,).
- Among the tabs at the top of the Settings window, choose “License”, the one with the key icon.
- Under “License key”, enter the email address the key was sent to in “Purchase email”, and paste the key into “Your key”.
- Press “Register”. When “License registered” appears and “License” under “Status” shows “Pro”, you are done.
The email address must match the one the key was issued to. If you received the key as a benefit, enter the address that email was sent to. One key covers up to three Macs. Remove a Mac you no longer use with “Remove from this Mac” on the same screen.
Pasting the key into “Pro (zero-setup AI)” on the “Connect the AI” page of the welcome guide lets the AI bar use it, but does not register the license. Register it in “License” in Settings as above as well.
4. Use Claude Code
What you need
- A paid Claude plan (Pro or above). Claude Code does not work on the Free plan. That subscription is between you and Anthropic.
- A Mac connected to the internet
This has nothing to do with Ultenix’s own plans. Claude Code works in Ultenix on the free plan too.
The easiest way: use the setup guide
Press “Get started with Claude Code” on the last page of the welcome guide. The “Guide” opens and takes you through three steps, one at a time.
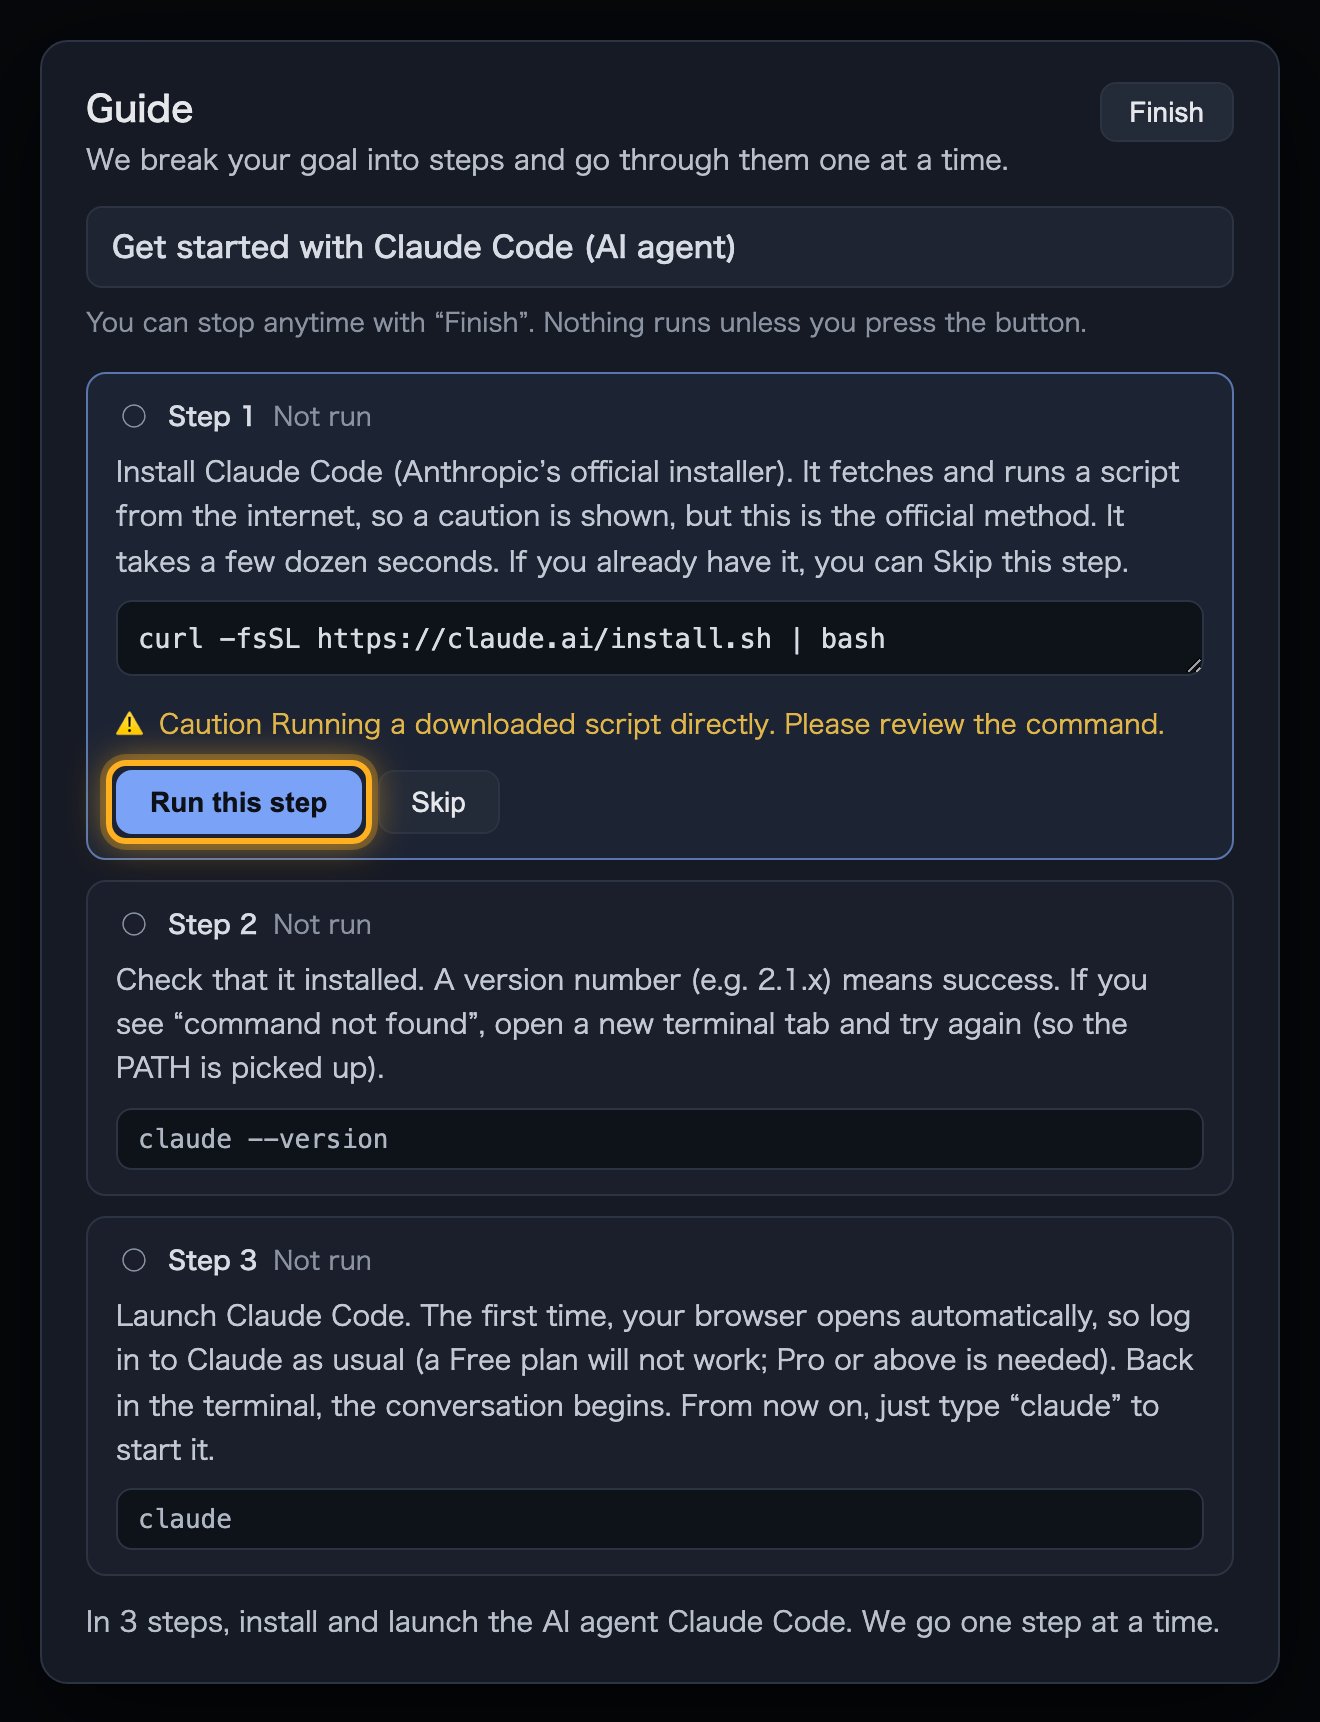
- Install Claude Code. A “⚠️ Caution” notice appears because the step fetches and runs a script from the internet; this is Anthropic’s official method. Press “Run this step”. It takes a few dozen seconds. If Claude Code is already installed, press “Skip”.
- Check the installation. Press “Run this step”; a version number (for example 2.1.x) means it worked.
- Launch Claude Code. Press “Run this step” and your browser opens automatically. Log in to Claude as usual.
- Back in the terminal, your conversation with Claude Code begins.
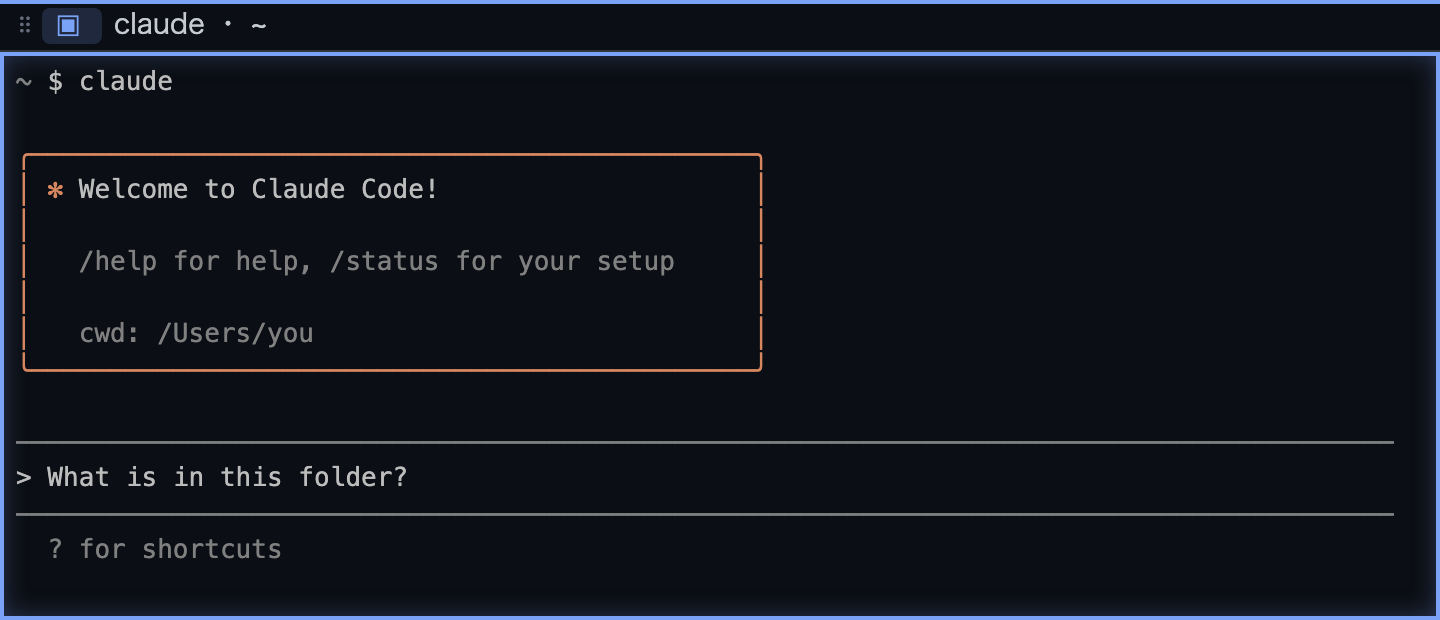
You can stop the guide any time with “Finish”. Nothing runs unless you press “Run this step”.
To start it later, press “Things you can do” in the AI bar at the bottom of the window and choose “★ Get started with Claude Code” at the top of the list. If the AI bar is not showing, choose “AI Command…” from the “Shell” menu.
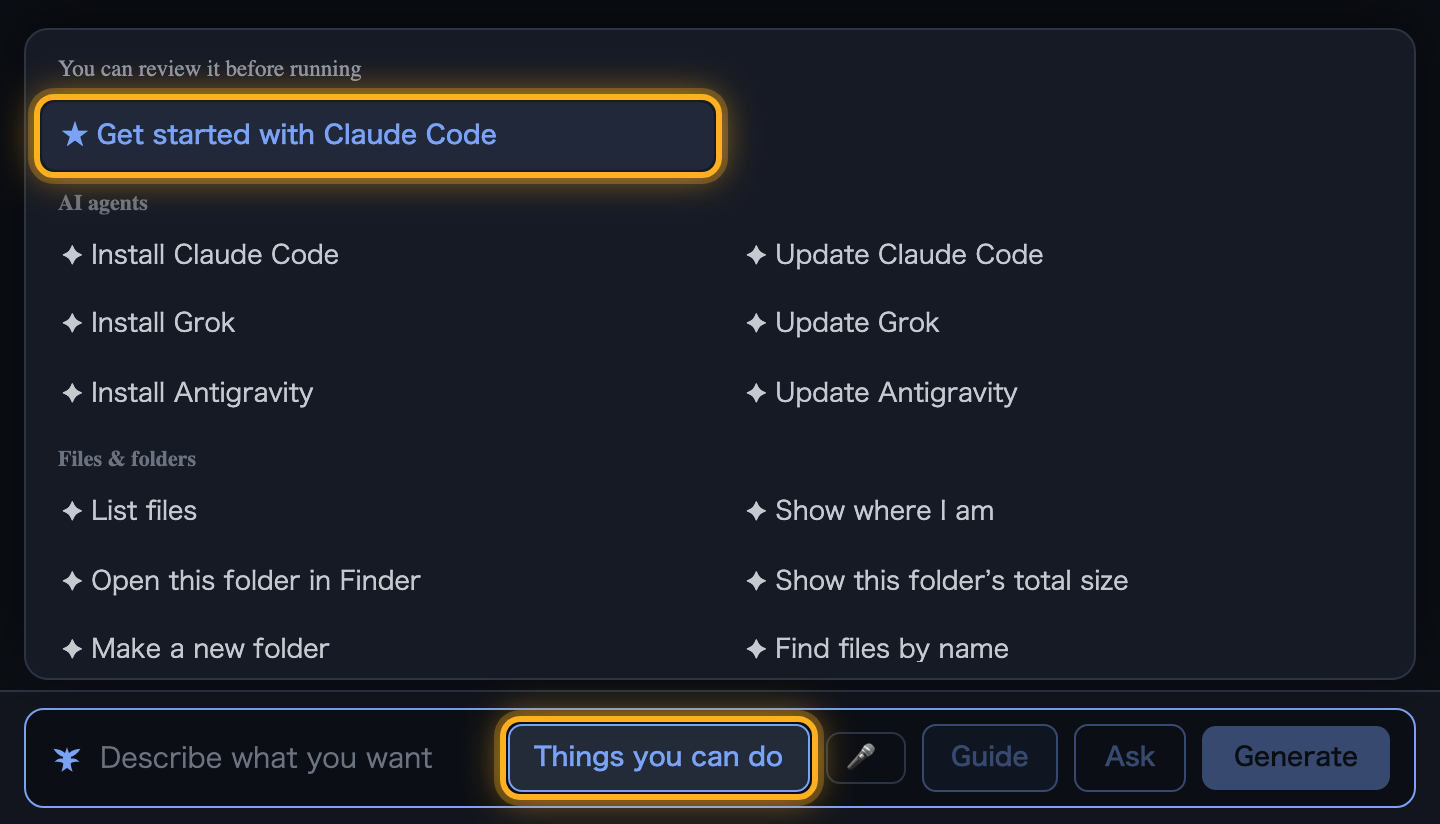
Installing it yourself
If you are comfortable with the terminal, type these commands into Ultenix and press return. They are the same commands the setup guide runs.
- Install Claude Code.
curl -fsSL https://claude.ai/install.sh | bash - Check the installation. A version number means it worked.
claude --version - Launch Claude Code. Your browser opens; log in to Claude, and the conversation begins when you return to the terminal.
claude
From then on, just type claude to start it.
5. The basics
A few things worth knowing from the start. All of them are in the “Shell” menu.
- Use “New Tab” (⌘T) to give each job its own tab.
- Use “Split Right” (⌘\) or “Split Down” (⇧⌘\) to place panes side by side in one tab.
- Choose “2 Side by Side” or “4 in a Grid” under “Pane Layout” to arrange panes in one go.
- Type claude in each pane to run several Claude Code sessions at once. You are notified when one stops to ask you something.
6. The Ultenix AI bar (optional)
The AI bar is an Ultenix feature: write something like “show me the files on my desktop” in the input at the bottom of the window, and it writes the command and shows it to you before anything runs. It is separate from Claude Code, and leaving it unused does not affect Claude Code at all.
The AI bar can use one of three backends.
Pro (zero-setup AI)Pro
Just paste your Ultenix Pro license key. No install and no API key; voice input and the Guide work too.
Local AI (Ollama)
Free and offline, and nothing you type leaves your Mac. You install Ollama yourself.
Claude API key
Paste an Anthropic API key. Anthropic bills you by usage. This is a separate contract from a paid Claude plan (such as Pro).
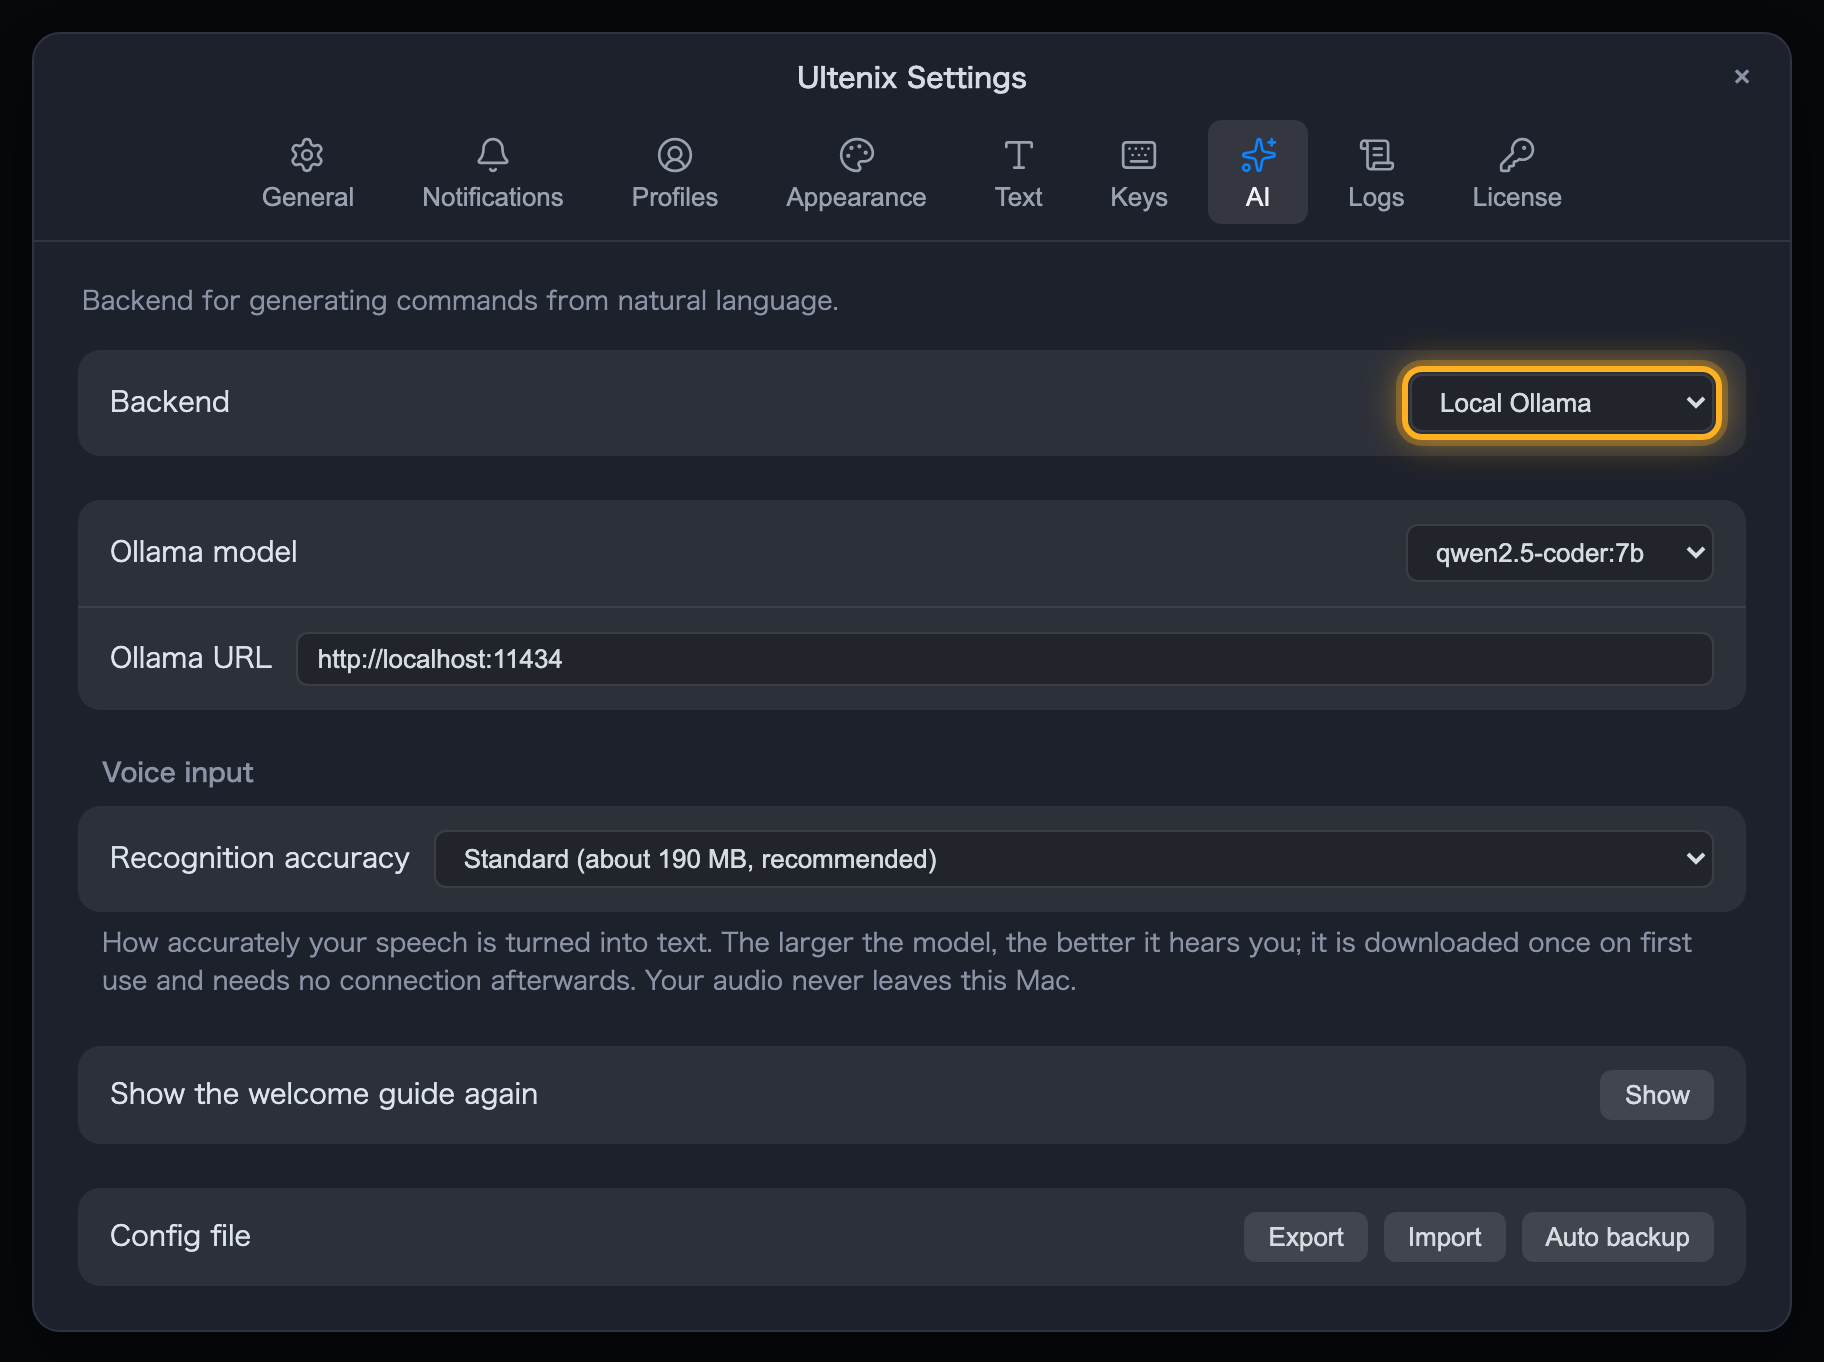
To set it, open “Settings…” (⌘,) from the “Shell” menu and choose under “Backend” in the “AI” tab.
Ultenix “Pro” and Claude’s “Pro” plan are different things. Claude Code needs a paid Claude plan; it does not need Ultenix Pro.
Using the local AI (Ollama)
Ollama is optional. You do not need it to use Claude Code. Set it up as follows if you want to use the AI bar for free and offline. Ollama supports macOS Sonoma (14) or later.
- Download the macOS version from the Ollama download page. Pressing “Install Ollama” under “Local AI (Ollama)” in the welcome guide opens the same page.
- Open the ollama.dmg file you downloaded and drag Ollama onto the Applications folder.
- Open Ollama from your Applications folder. If it asks for permission to make the ollama command available, allow it.
- Get the model Ultenix uses. Ultenix does not download it for you. Type this command into the Ultenix terminal and press return. The model is about 4.7 GB, so the download takes a while.
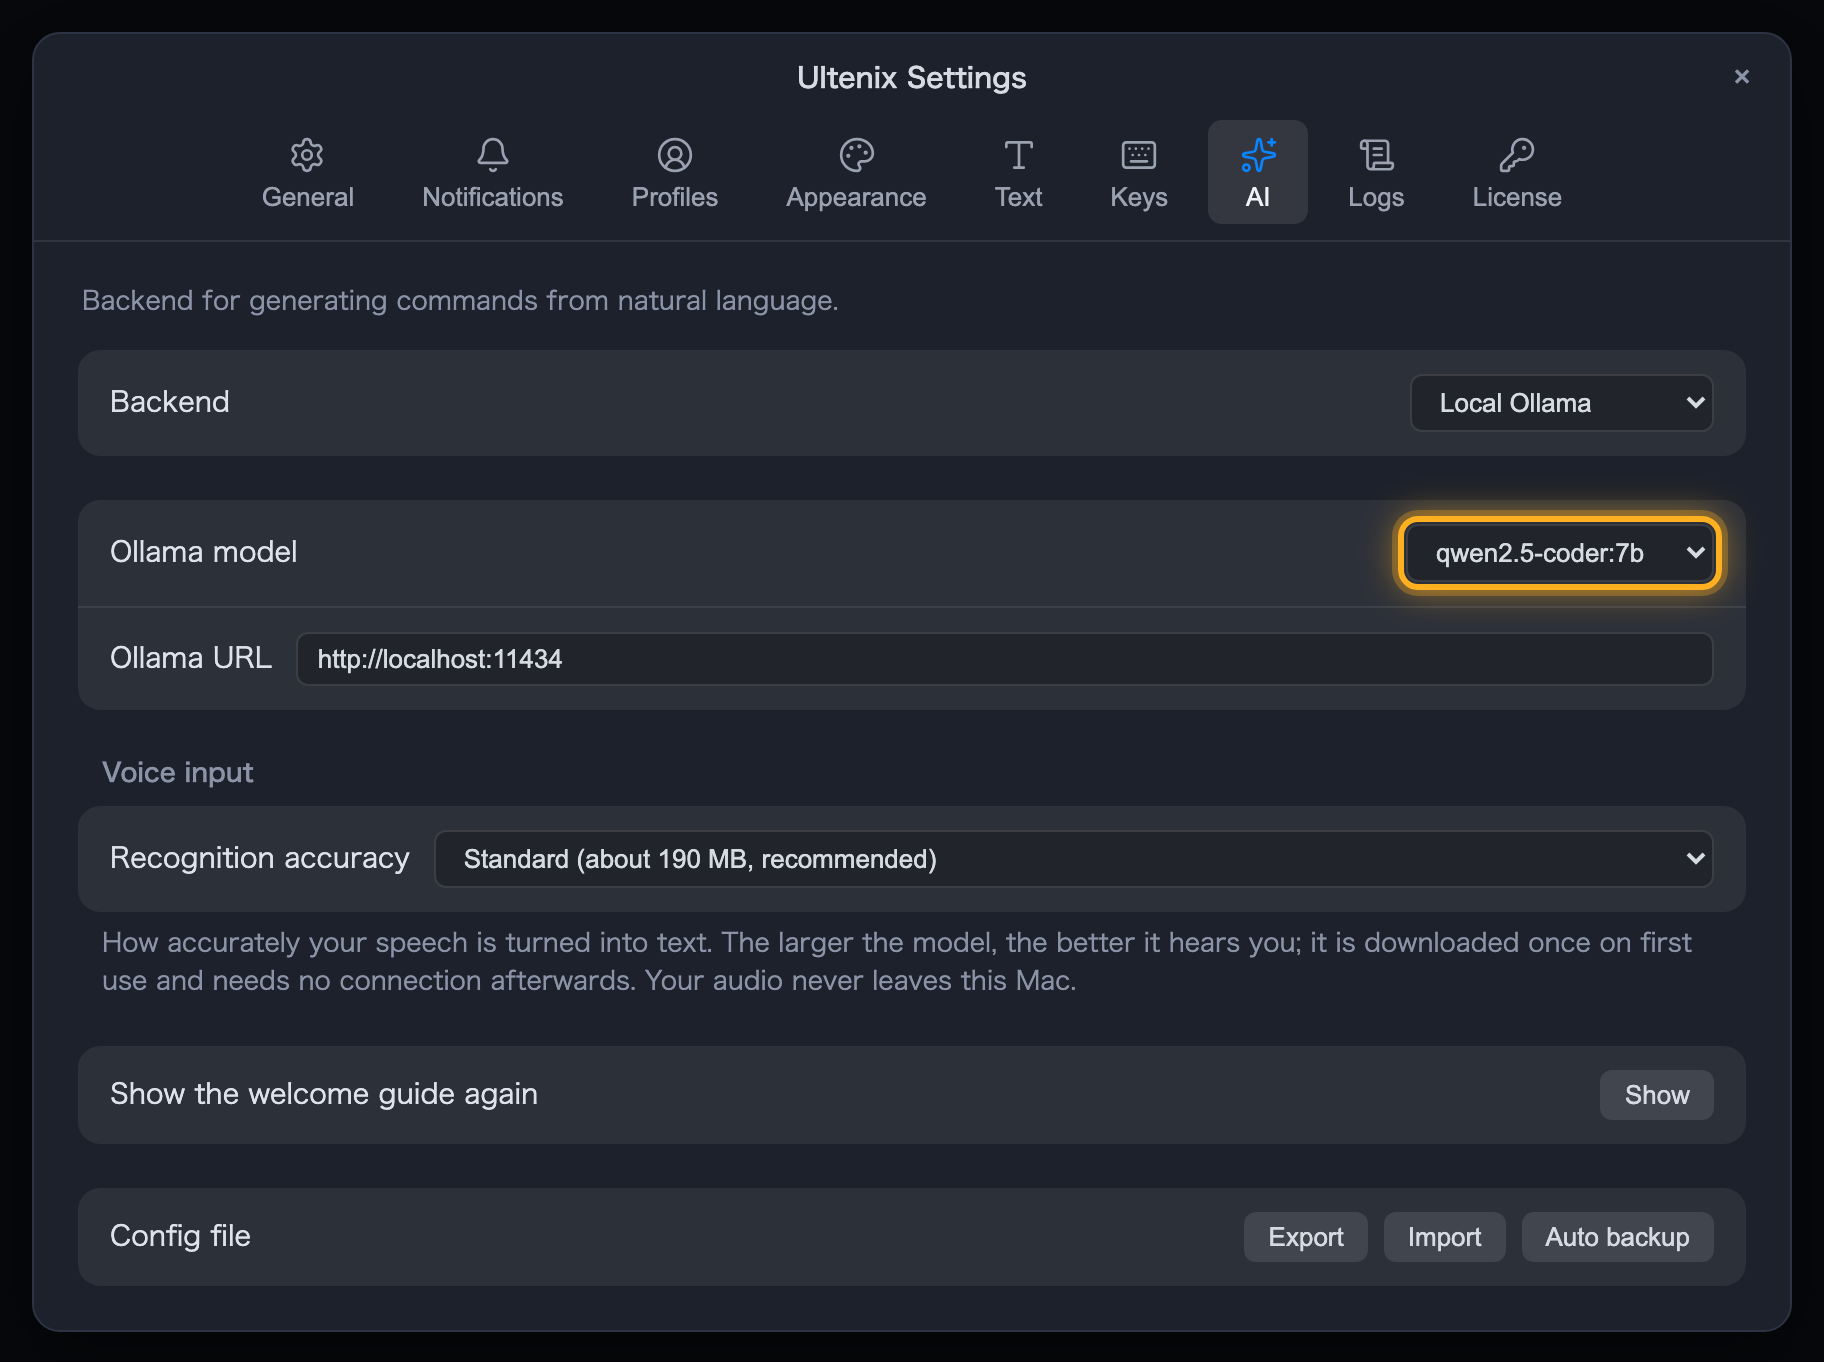
ollama pull qwen2.5-coder:7b - If you are still in the welcome guide, press “Check again” on the “Connect the AI” page. When “✓ Local AI is ready” appears, you are all set. If you have already closed the guide, choose “Local Ollama” under “Backend” in the “AI” tab of Settings.
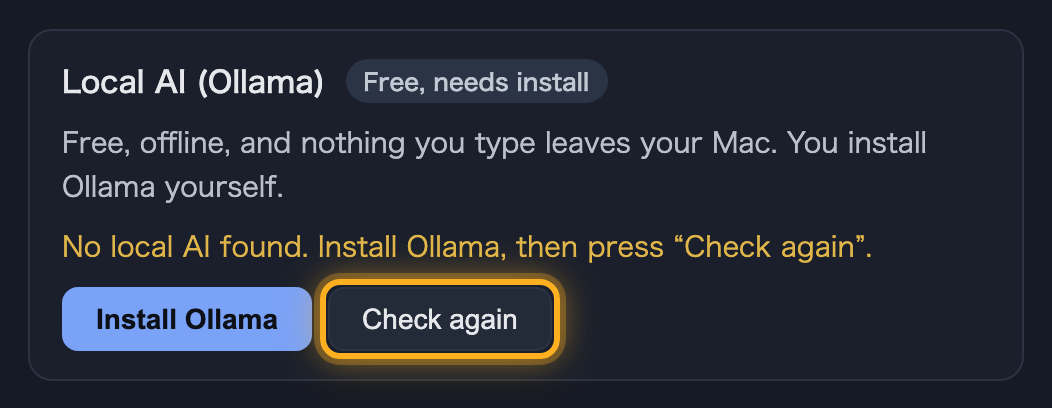
The default “Ollama model” in Settings is qwen2.5-coder:7b, the model from step 4. If you choose a different model from the list, run ollama pull with that model’s name.
If you use the AI bar while Ollama is not running, a “Start the local AI and try again” button appears with the error. Press it and Ultenix starts Ollama and runs the same request again.
7. Common problems
It connects to Ollama instead of Claude
What is connected to Ollama is the AI bar, not Claude Code. If Ollama is installed on your Mac, the welcome guide picks it automatically as the AI bar’s backend. Claude Code is started by typing claude in the terminal and works regardless of this setting. To change the AI bar’s backend, choose another one under “Backend” in the “AI” tab of Settings.
The AI bar shows an error
The AI bar’s backend is not available (Ollama is not running, no API key is saved, and so on). Check the backend in the “AI” tab of Settings. Claude Code works regardless of the AI bar, so if you do not use the AI bar there is nothing to change.
Typing claude shows “command not found”
Right after installing, the tab you have open may not have picked up the change yet. Choose “New Tab” from the “Shell” menu and type it again in the new tab. If it still appears, run the install command once more.
I logged in but Claude Code does not work
Claude Code does not work on Claude’s Free plan. Log in with an account on Claude Pro or above.
It says “This license key was issued to a different email address”
The address in “Purchase email” does not match the one the key was issued to. Enter the address the license key email was sent to, and press “Register” again.
I closed the welcome guide
You can still start the same setup guide from “Things you can do” in the AI bar by choosing “★ Get started with Claude Code”. To see the welcome guide itself again, press “Show” next to “Show the welcome guide again” in the “AI” tab of Settings.
8. Useful extras (optional)
Told when you are needed
You are notified when a command finishes or Claude Code stops to ask you something. Change this in the “Notifications” tab of Settings.
Drive it from iPhone and iPadPro
Reach the panes running on your Mac from your iPhone and iPad, with the waiting notices following you there. Choose “Connect iPhone…” from the “Shell” menu. The iPhone and iPad apps are not published yet.